
Pro Plus and above users can effortlessly integrate and display API data on screens using the user-friendly API gateway and API-to-Screen feature, simplifying the process with minimal coding.
At OptiSigns, we are striving to build an easy-to-use platform and continuously exploring ways to help make complex use cases more user-friendly. With the API gateway and API-to-Screen feature, users can easily integrate their API from other systems, get it mapped using the designer app, and then publish it to the screen.
This is a no-code/low-code solution, it can be set up by users without a software engineering background. It can be applied to many common use cases:
- Digital menu board: Integrate with your POS systems and get the DMB updated automatically, as well as edit the format of your DMB using the designer app whenever needed.
- Automated HR update: Use the API from your HR systems to display birthdays or work anniversaries on the screens automatically.
- Any other information display use cases that you will need to consume API data and display the data on the screens.
This feature mainly consists of two parts.
- API gateway, this is a console to allows users to centrally manage the APIs, as well as configure and test the APIs.
- API-to-Screen data mapping, use the designer app to get an element on the designer mapped to the API data, the screens will call the API and use the API data on the element when there is a change.
In this guide, we will walk you through how to get it set up with the example below using API from the Clover POS system.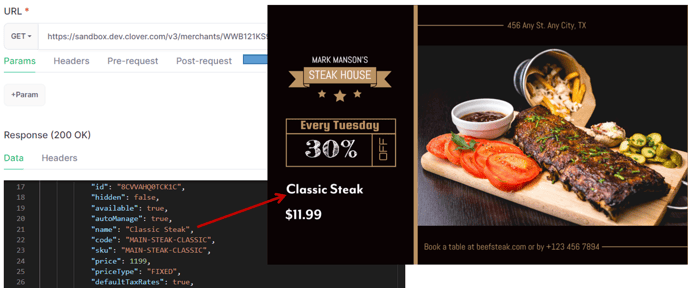
How to use API Gateway:
The API gateway is a powerful tool that allows users to centrally manage the APIs, as well as configure and test the APIs. With an API gateway, users can
- Use API keystore to securely store and use the API keys from the other systems.
- Use and test the API endpoints, with the capability to modify the http headers and parameters.
- Use substitution parameters and pre-processing and post-processing rules to handle complex integration. Pre-processing rules can help you handle those API integration situations that require an additional call to get an authentication token before making the API call. Post-processing will allow you to process the returned data and tailor it to fit your use better.
In this example, we will mainly cover the use of API keystore to store the Clover API token and use the Clover API to get the item and price data and put it on the screen.
1. Maintain the API auth token in the API keystore.
You can get to the API gateway from the admin menu, it is under Advanced→API gateway. Or use the link below.
https://app.optisigns.com/app/s/request-apis.
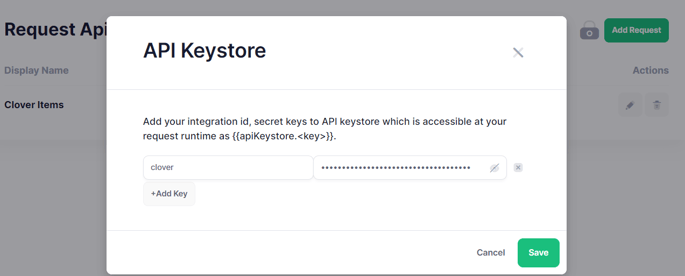
Click the Lock icon to launch the API Keystore console.
Then maintain the key in the console and give it a name, this name will be used later in the API call configuration. In this example, we put Clover's bearer authentication token in the keystore.

2. Set up and test the API request.
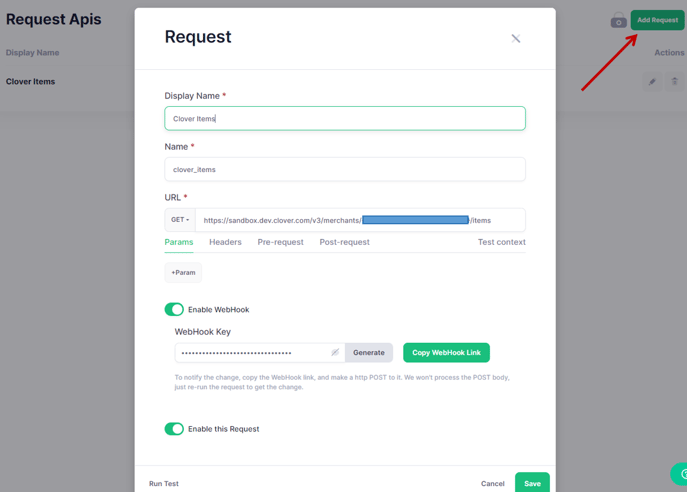
Click the "Add Request" button, it will launch the window for you to configure and test the API request.
- Display Name: This will be shown under the API gateway list, mainly to help users identify the API request.
- Name: This is used as a reference to the API request, it is a technical name that will be used later in the path to refer to the API request data.
- URL: This is the API endpoint, you can use the GET or POST method depending on the API request, for example, if you are using GraphQL, then all requests will be using POST.
- You can also configure the parameters. request headers and pre-processing and post-processing rules here.
- Pre-processing is mainly to prepare for the API call, for example, if the API request needs to get a short-lived authentication token associated with each API call, you can use the pre-processing rule to make another call to get the token and pass it to the header or request body when making the API call.
- Post-processing is mainly to process the returned data, transform it, and have it fit into the use on the screen better.
- Enable Webhook: This will generate a webhook link and an associated token, you can use the webhook to notify us that there is a change in the data, then the API request will be refreshed in several seconds and the screen will be updated automatically.
- Enable this request: Set the status of the API request.
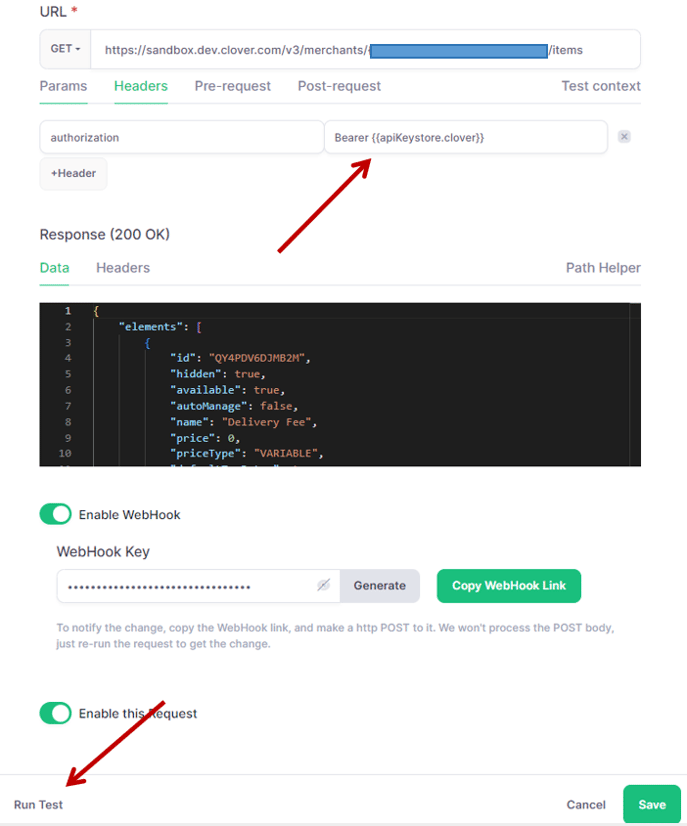
You can configure the header and test the API request as well. In this example, we use the Bearer token for the authentication, and we reference the token using the API keystore.
Click "Run Test", and you will be able to see the response from the API.
3. (Optional)Use substitution parameters from device attributes.
Many POS systems are licensed by store/location, you can configure a single API request in the API gateway and have it work with different locations by using substitution parameters.
To do this, go to the corresponding screens and click the wrench icon on the bottom of the screen edit page, you can have the value maintained here. In the example, we are maintaining the Clover merchangeID here.
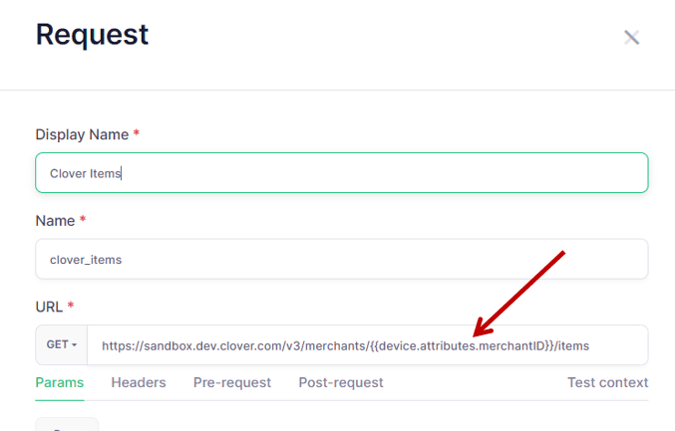
Then go to the API request config page, and you can substitute the merchant ID in the API endpoint with the previously defined attribute. When the API call is triggered on the device, it will take the value from the device and substitute it at runtime.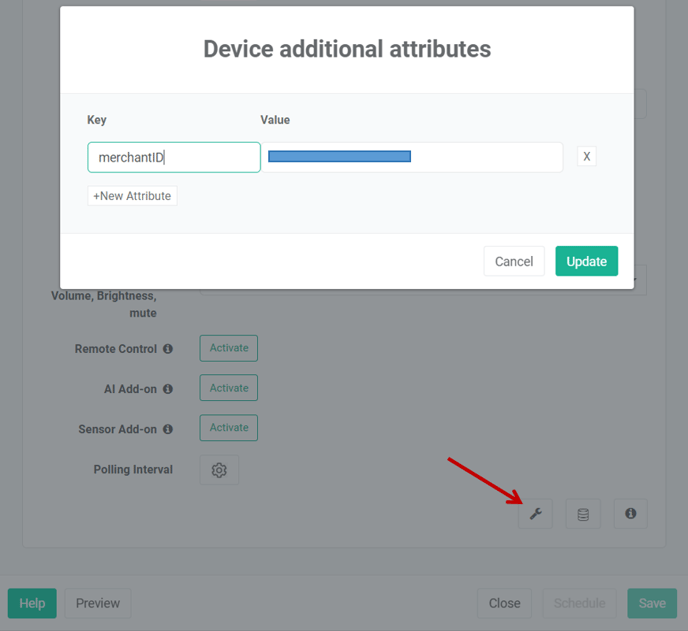
How to map API data in Designer:
You can use the designer app and templates to do the formatting and have the API data source to handle the data mapping.
You can map any text box or image element on the designer, when you map an image element, the URL of the image will be replaced at run time.
1. Create API DataSource
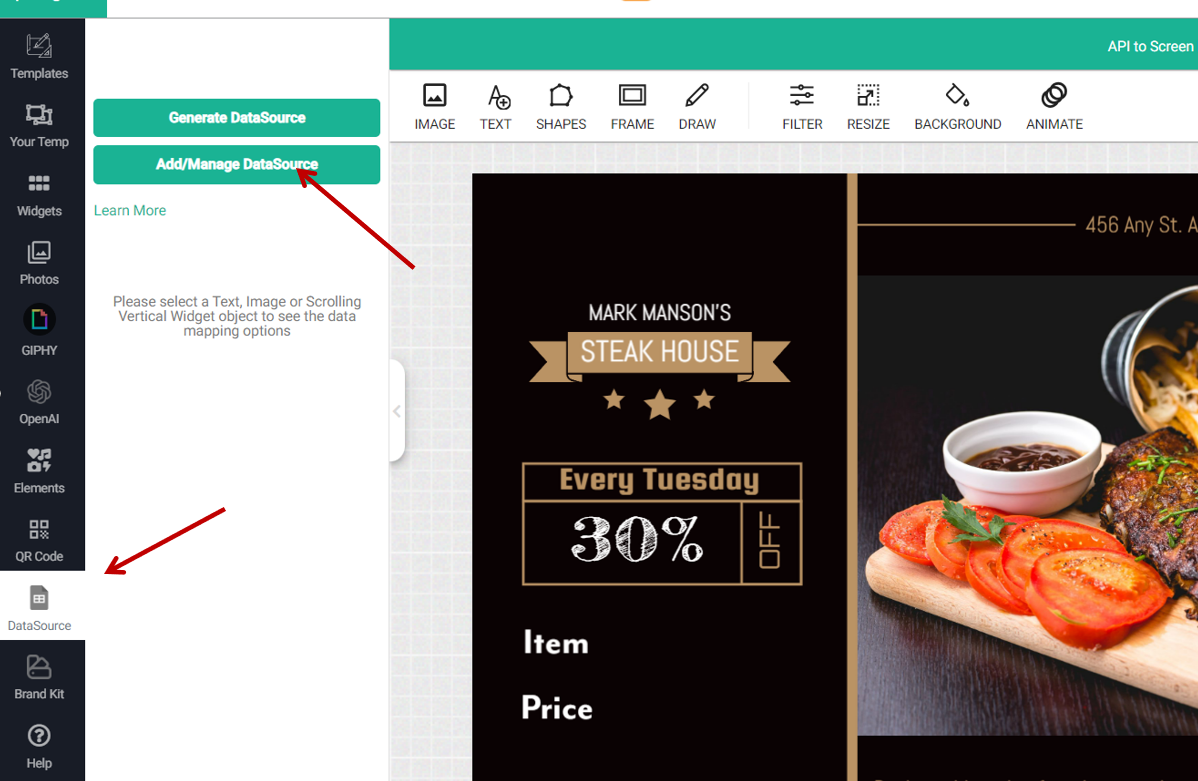
In your design, go to "Data Source" and click "Add/Manage DataSource" to add an API data source to the design.
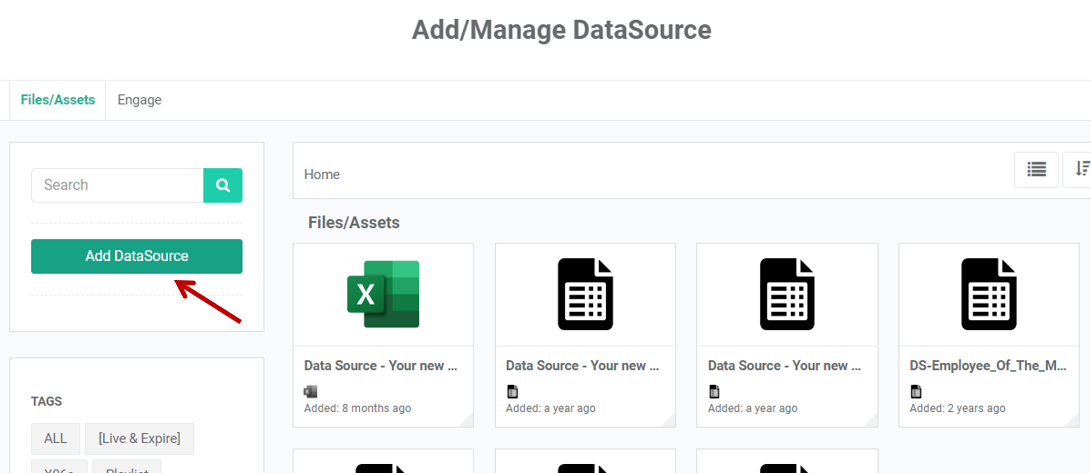
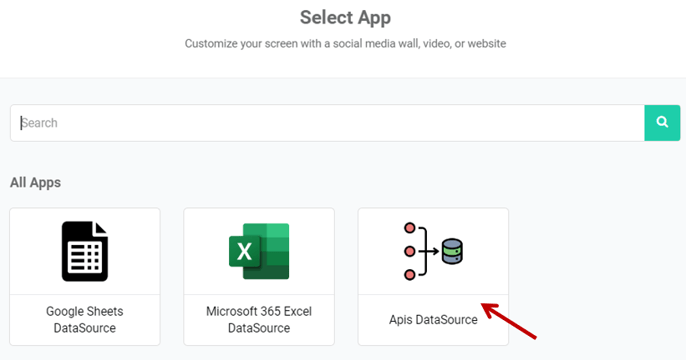
Click "Add DataSource" in the popup, and then select "API DataSource" under app selection.
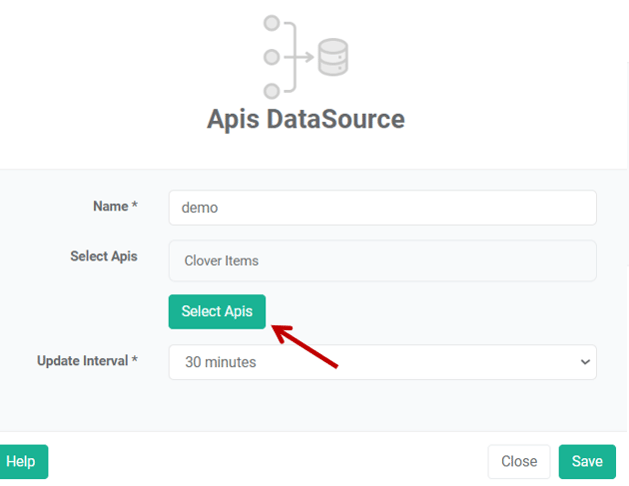
In the Api DataSource, select the APIs that you want to use in your design, you can select multiple APIs too, and the Api DataSource will automatically get it aggregated.
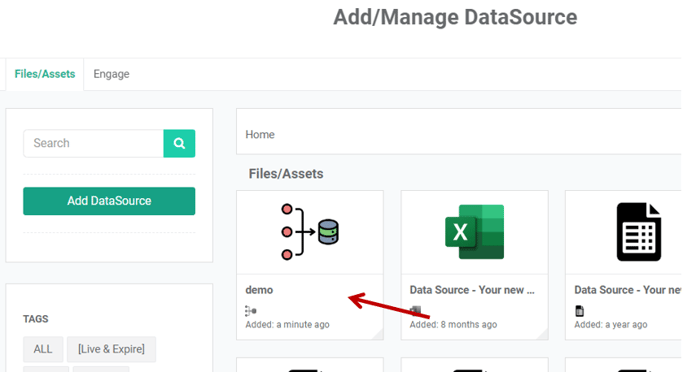
Give your Api DataSource a name and Save it, and the Api DataSource is created. Then select the newly created Api DataSource and associate it with your design.
2. Maintain the element mapping
Once the API DataSource is associated with your design, you are ready to do the data mapping.
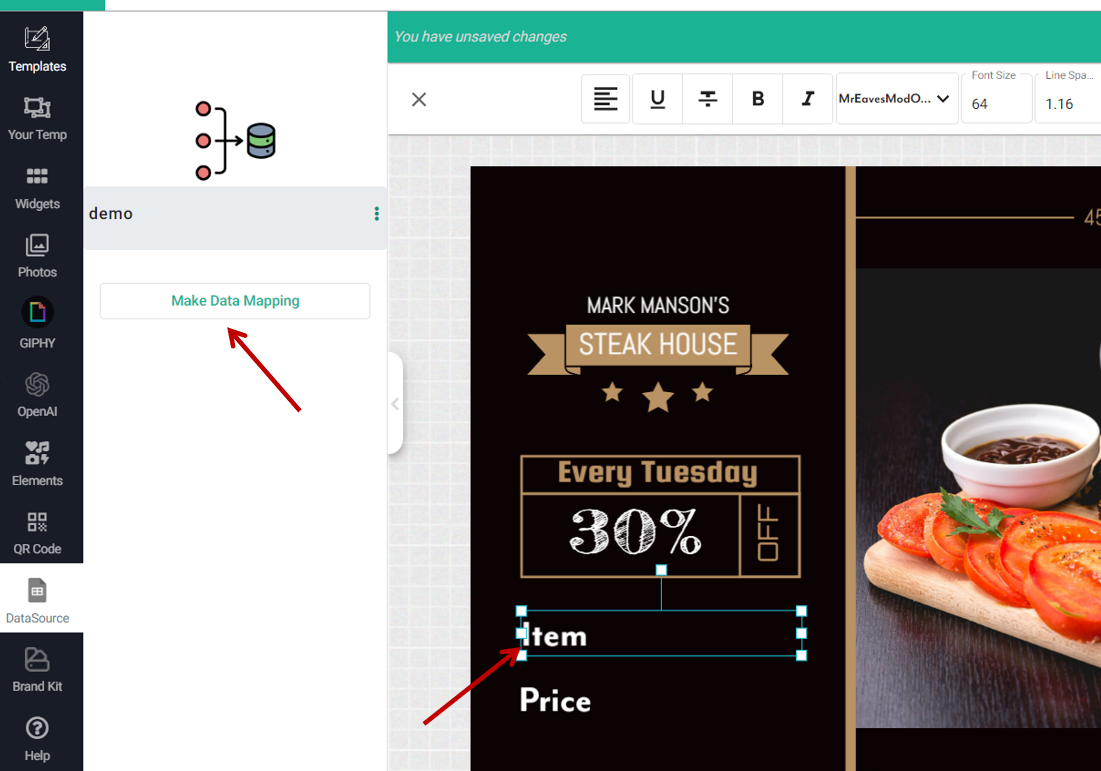
This is very simple, just select the element that you want to do the data mapping and click on "Make Data Mapping".
Then put the path to the data object of the Api request there, when the design is displayed on the screen, the value will be replaced at runtime.
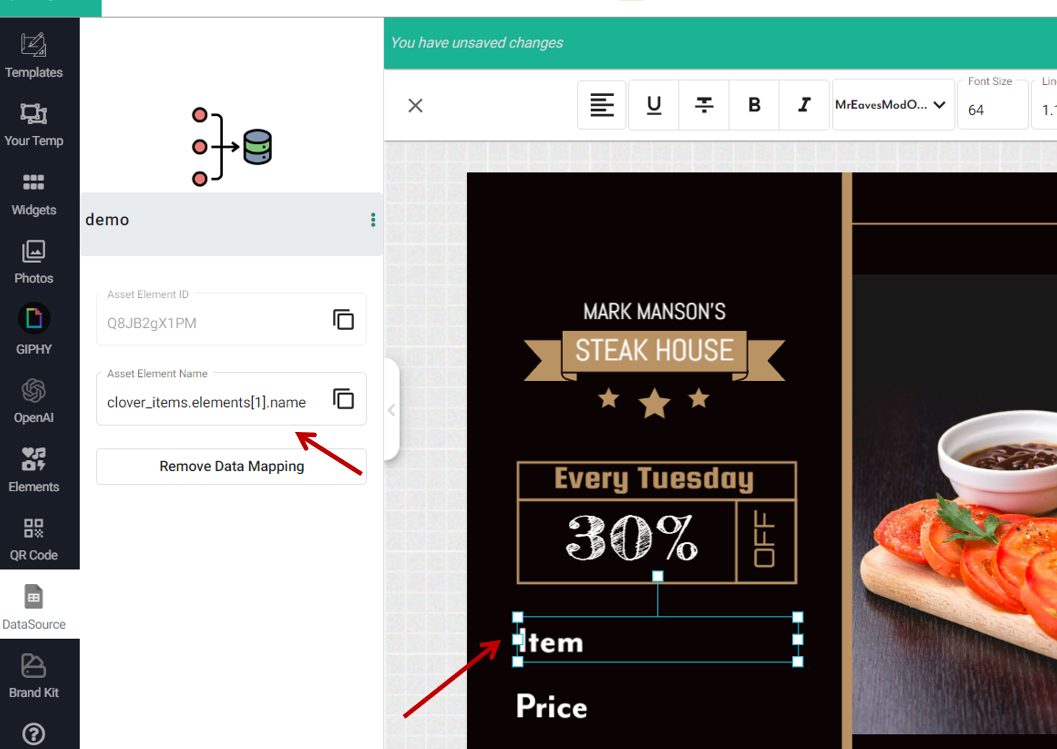
Repeat this step for all the elements that you want to map to the API data source, and save the design. Your design is ready to go.
In the example, we have the item name and price mapped to the Api request, when it is published on the screen, the value will be automatically replaced with the value from the Api request. So if you are making an update in the Clover POS system, the change will be reflected on the screen automatically.

That's all!
This is how you can consume API data and get it published on your screen. And most importantly, without coding.
If you have any additional questions, concerns, or any feedback about OptiSigns, feel free to reach out to our support team at support@optisigns.com